(TIP: The blue text are links to web pages for more information)
This is a special edition of Hangar Talk that I have been waiting a while to write about, namely Kevin Hay’s 50% scale Pitts S1a “Special”
In the April Hangar Talk I made a joking reference to a “rumour” of another new model that was soon to show itself at the field. Kevin Hay and his construction “manager” Merv Cameron have now brought the model out from “behind the closed doors”.
Well it might have taken a while coming but it has certainly been worth the wait! Kevin and Merv first “plotted” this project some 6 or 7 years ago. The model was built from a “scaled up” set of 1/3 scale “Dan Smart” plans that Kevin and Merv had used to build a smaller scale Pitts some years ago. The model (not sure if “model” fits with a plane of this size) is of a Pitts S1a and is a 50% scale of the “Betty Skelton” aircraft. Betty Skelton was a remarkable pilot and you can read more about her here. The graphics were modelled on full size Pitts located in Victoria and owned by David Pilkington
The Build
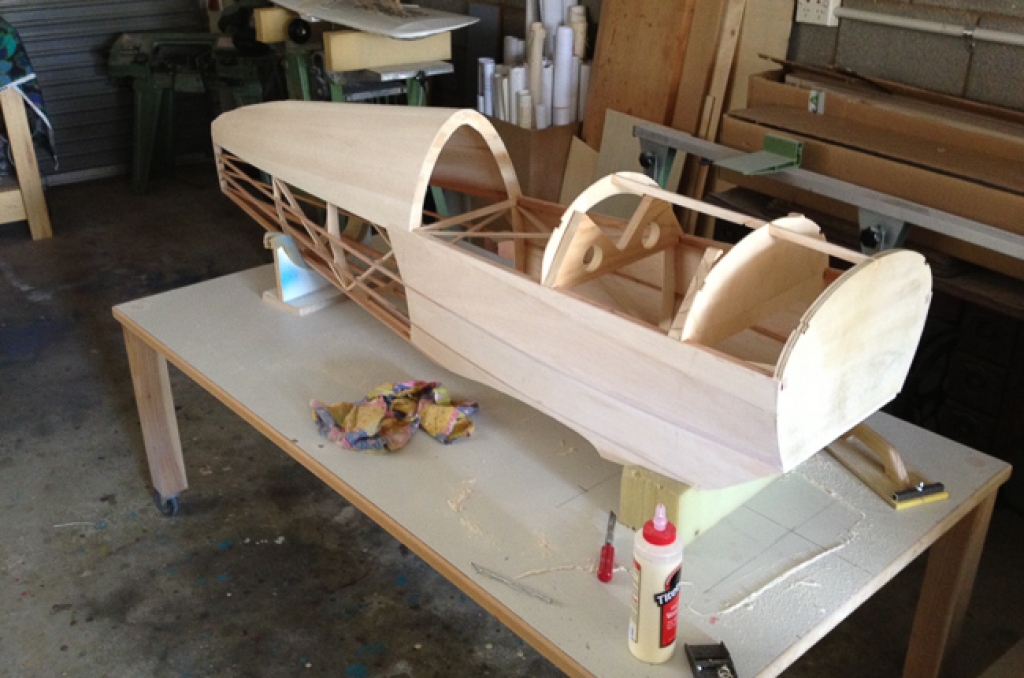
It is a fully built up construction and when you see the construction photos, you can see that a master craftsman has built it. Merv’s work can often go unheralded because the wood craftsmanship that Merv employs to build models (and he has built plenty of big models, remember the 3.6m Cessna Aerobat!), is often hidden under either solid covering or marvellous paint schemes. I am sure that when you witness the work in this build Merv will be right up there with the best. After reviewing the plans, Merv advised Kevin “I’m about to place an order for balsa and I reckon about $900 to start with”. After Kevin got over the initial shock, he said to Merv “Put the order in”. As expected more balsa was needed and the estimate is well over $1000 for the balsa alone! Merv also had to think about the size of this model and the size of his workshop. “Mmmm, I better clean up a bit if I’m to fit a 50% scale Pitts in my single car garage but I’ve built bigger than this so it will be no problem!”
After a quick shift of a few models, boxes etc. Merv thought “space is tight but no problems for me”. Merv commenced the build in about January 2013 and set about doing what he does best – cutting and shaping balsa! However doing what Merv does best has its challenges when you are building a 50% scale model in your garage. Merv is not 6’ tall and as he thought about constructing the fuselage, he wondered “how am I going to work on this on top of my bench?” “Build a stool to stand on? No, build a shorter bench and put it on wheels so I can move it around where it is comfortable to work on!”
Merv made up molds for the wheel pants and cowl from foam. Once finished, he had to remove the foam from inside the cowl and wheel pants. “I better not do this in the workshop” he thought. So out into the backyard to remove all the foam and didn’t the yard look like it had been snowing! The tail wheel was handmade by Merv, who also has this enviable skill with a lathe and any metal work.
Now take a look at some of the pictures in the slideshow below and you’ll see what outstanding craftsmanship skills Merv has.
Finishing
Next was the covering, which was done in Solartex. A model of this size was going to need an equally impressive power plant so another quick look at the “piggy bank” because Kevin decided on a DLE 222 4 cylinder “boxer” engine and the RRP of these is over $2000 if you don’t mind! The motor was supplied by Scott Pittick of DLE Australia
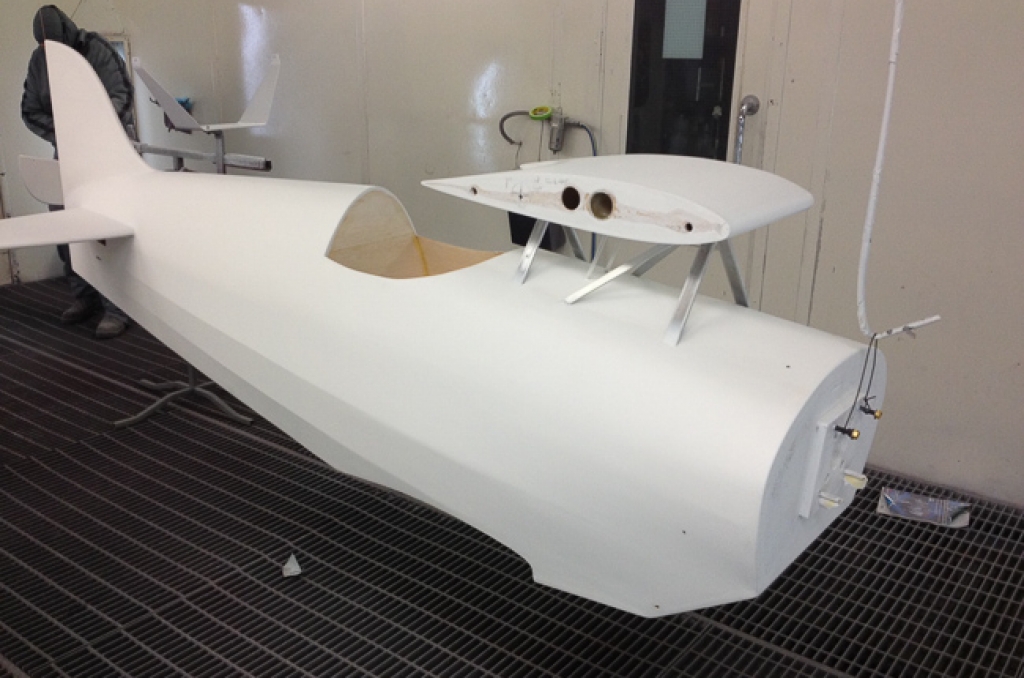
Once the covering was completed, a test fit of the engine and some hardware was fitted, the model left Merv’s workshop and arrived at ZZ Autos in July for the paint job. First primed and then finished in 2 pack auto paint. Very handy if you own a panel beating business complete with spray booth!
The paint job was now finished and now the model was off to Doc Signs and the expertise of Mat Gardner of Creative Digital Studio. Kevin handed Mat the model and the photographs of David Pilkington’s full size colour scheme. Mat welcomed the challenge. Normally he receives requests for various signs and eye popping promotional posters but he was relishing the opportunity to put the finishing artwork on this aircraft. It seemed Mat had fallen in love with the project too! Kevin was very impressed with the quality of the artwork and would recommend Mat to anyone for that special project. Let’s face it, the artwork can either make or break the final impression and the finish on the Pitts certainly leaves an impression!
Then came the fitting out of all the hardware, and this required quite a bit of planning. Kevin has, to this point, been very happy with 36Mhz. However a call to some of his big scale buddies on the mainland and it was time for a rethink. “With all those long servo cables and other wires, acting as aerials, there is no way I would commit the model to the air with a 36mHz”, quipped Steve Richardson from Desert Aircraft Australia. Now Kevin thought “I’ve already committed a bucket load of money to this project but I don’t want to lose it due to interference”. It was back into the seemingly bottomless “piggy bank” for a new Futaba 14SG 2.4gHz set.
Having decided on the radio, this would now influence some the electronics too. The 14SG supports Futaba’s S.Bus system that allows one cable from the receiver to communicate with all the servos in your model. “How can that work?” you might ask. Well using digital technology, (and to simplify it) think of it a bit like your telephone line using what can be called “multiplexing”. This is where your telephone line can not only carry a telephone conversation but at the same time can carry your internet data at the same time down a single pair of copper wires. The Futaba (and other brands) can transmit multiple signals down a single connection from the receiver to up to 16 servos! To quote Futaba’s website “A single S.Bus cable can carry signals to as many channels as your transmitter can handle. You no longer have to worry about plugging in the wrong servo to the wrong channel, because each servo knows what channel it is dedicated to in advance.”
Kevin then had to decide what digital servos he would use in the aircraft. The decision was to go with Hitec 7954SH “High Voltage Torque”. With 9 servos installed there was not much change out of $900 for the servos alone. Installation required more hardware to ensure the controls were up to the task and Kevin elected to go with the SWB systems distributed by Desert Aircraft Australia. This involved servo rails and arms as well as the cables and turnbuckles to connect to the various control surfaces. Kevin was very grateful for the help from Ian Howard and Steve Richardson of DA Australia.
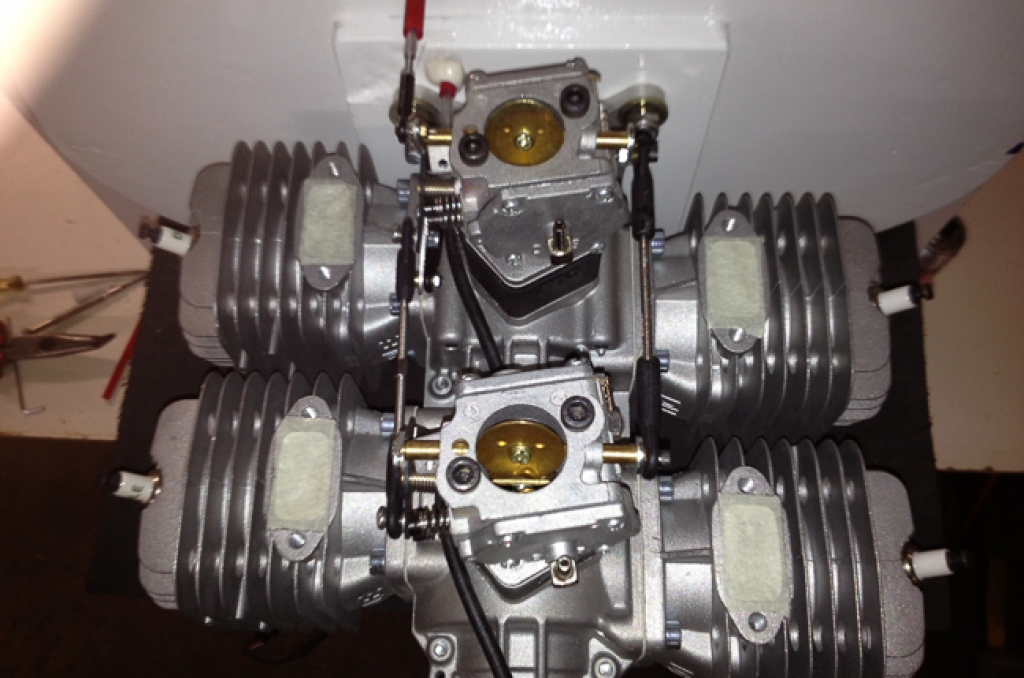
Kevin had to fabricate a cooling shroud for the engine to make sure those rear cylinders were adequately cooled too. Here are some images of the motor and the cooling shroud.
The motor produces 21.5hp and uses a 32 x 12 Mejzlik carbon prop. At a cost of $150 you need to look after them. Talking about “looking after them”, Kevin was doing some trial run ups of the motor in the driveway of his home. He later noticed there were some “nicks” on the prop. “How did that happen” he pondered? A later run up, again in the driveway and he soon realised that the prop draw was so great it was picking up pieces of gravel from the driveway and drawing them into the prop!! No more run-ups on the driveway.
On-board electronics are powered by 3 x 4 cell 5200 Li-Ion packs. 2 for airborne packs and 1 for the ignition system. The PowerBox also controls the smoke system, the fuel pump and the ignition system. There’s a lot going on inside that little box! Take a look inside the model and note the very neat cabling and sturdy hardware mounting all through the model (Looks like he was sizing Taylor up as the pilot!!) –
Completion
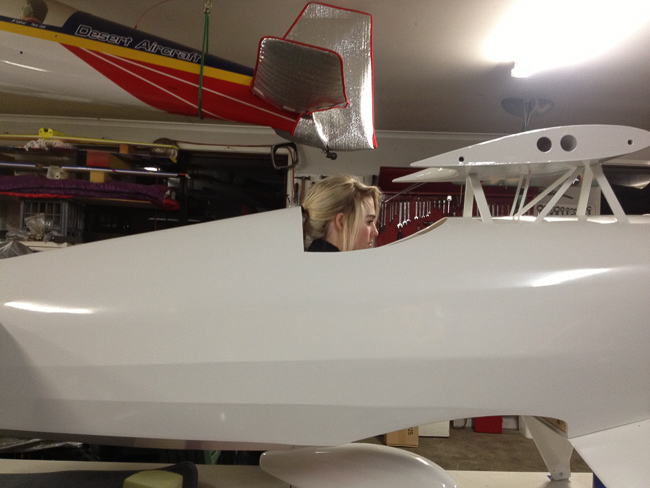
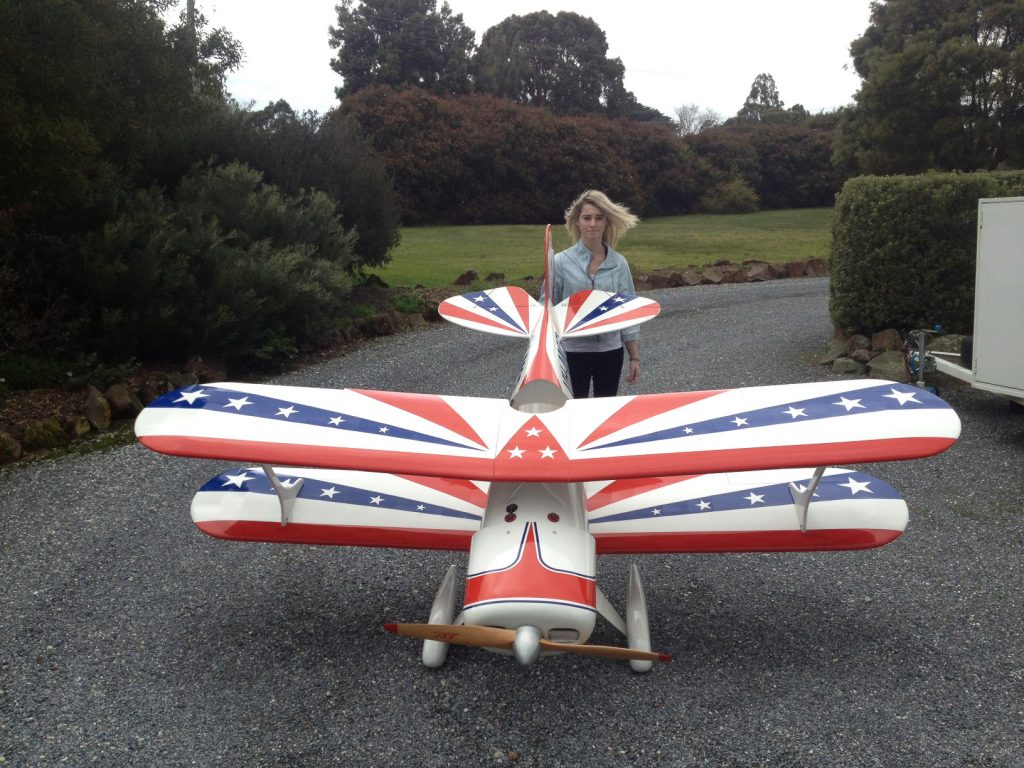
The model was completed, ready to fly, in April 2014. Some sixteen months after the build commenced. Here it is below proudly displayed by his daughter, Taylor.
The Flight
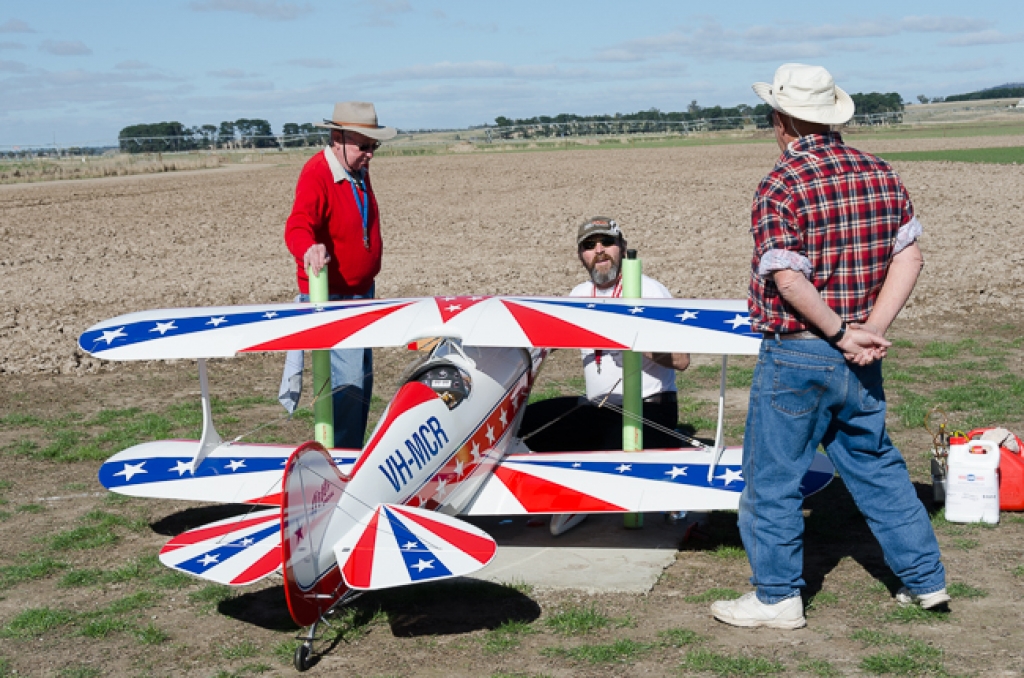
Kevin announced its “public” unveiling on April 27, 2014 and a few of us were lucky enough to be there to see it fly. The model is very impressive both on the ground and in the air. The wooden prop, shown above, generates a lot of prop noise and Kevin states it is not as effective as the carbon Mejzilk prop. The smoke system adds “realism” to the flight too and that 4 cylinder DL engine effortlessly pulls it around the sky. The 2 x 900ml fuel tanks give a run time of around 15 minutes, leaving a bit under 200ml in the tanks for safety when the flight is over. The three access points at the top rear of the cowl are for the fuel and the smoke oil.
Update June 12
I now know that on the maiden flight, Kevin had to put in 1 “click’ of elevator trim, then after another circuit, took it out again! Now that’s a measure of a good build – no trim off the bench. Understandably, watching this model take to the skies, and then no trim required, gave Merv great pleasure.
The Full Size Pitts
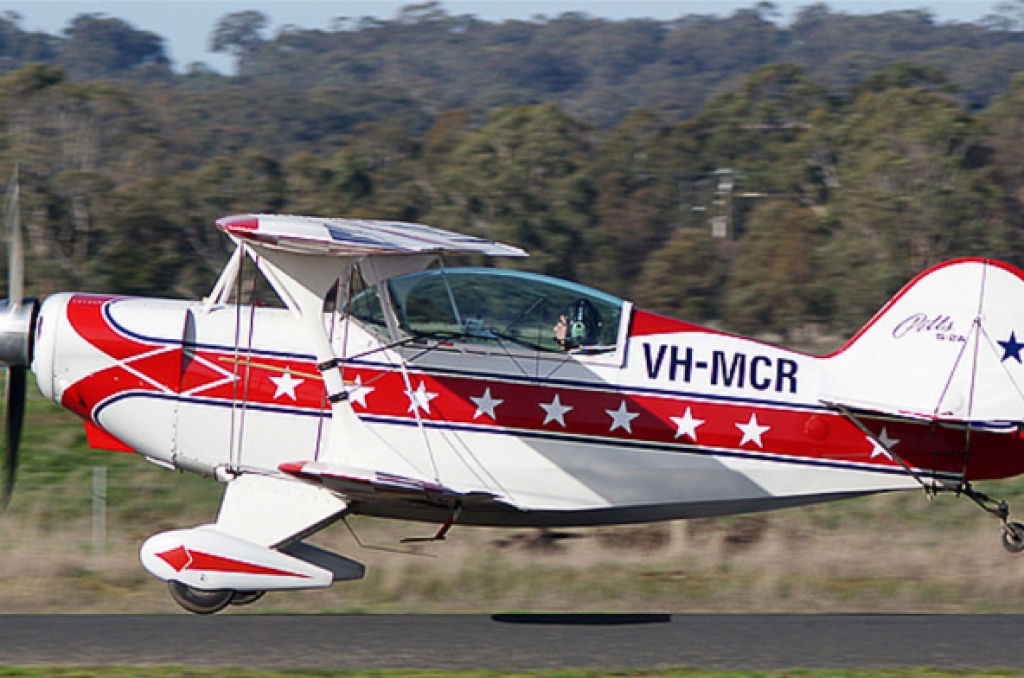
Below are some pictures of the full size Pitts, owned by David Pilkington, that Kevin used for the graphic design on his model. David has been very helpful in supplying Kevin with plenty of scale information and photos too.
Specifications
| Model | Pitts S1a “Special” |
| Wingspan | 2.72m |
| Length | 2.43m |
| Weight | 24.98kg |
| Engine | DLE-222 / 222.5cc / 21.5hp @ 7500rpm |
| Prop | 32 x 12 Mejzlik |
| Servos | E/R/A – 8 x Hitech HS-7954SH |
| Throttle – Hitech HS-5625MG | |
| Ignition System | PowerBox “Spark Switch” x 2 |
| Smoker System | PowerBox “Smokepump“ |
| On-board control | Powerbox Competition System |
| Transmitter | Futaba 14SG |
| Receivers | Futaba R6303SB 3ch+S-Bus |
| Covering | Solartex |
| Paint | Spies Hecker 2K |
| Graphics | Creative Digital Studio |
| Fuel Tanks | 2 x 900ml gives a 15min flight with a bit to spare |
| Smoke Oil | 1 x 850ml |
| Batteries | 3 x 4 cell 52 mAh Lii-Ion |
The aircraft certainly is a showpiece and I’ll let you do the sums about how much it cost but I bet you would not get much change out of $10,000. That’s an awful lot of dollars on the end of those sticks and I don’t know about anyone else but I’m not sure I could keep the nerves under control with that sort of investment but Kevin handled it with consumate ease. I’m sure you will all agree that Merv and Kevin have excelled themselves with this one. “What’s next Merv?” I asked. “I’m done now,” said Merv. Well what a great way to finish your large scale building Merv! Congratulations to Kevin for bringing such a project to fruition and for sharing all the photos too. With all these large models that Kevin has, I just wonder where he keeps them all?
I have another build to write about next but I’m sure there are many more out there (I know of a few) so how about letting me know and I can write about your model too? Not only is it good to keep our members informed but it’s a good place to show off your latest project to family and friends. Unfortunately, getting information for the web is sometimes like extracting teeth. If our web site is lacking information, I need YOU to give it to me. I don’t require much, a few photos, some specifications, a few anecdotes and I’ll use my journalistic licence to fill in the story. So what are you waiting for? Drop me an email or give me a call and we’ll go from there.
George

